Website Builder


A simple no-code website builder module for Moodle.

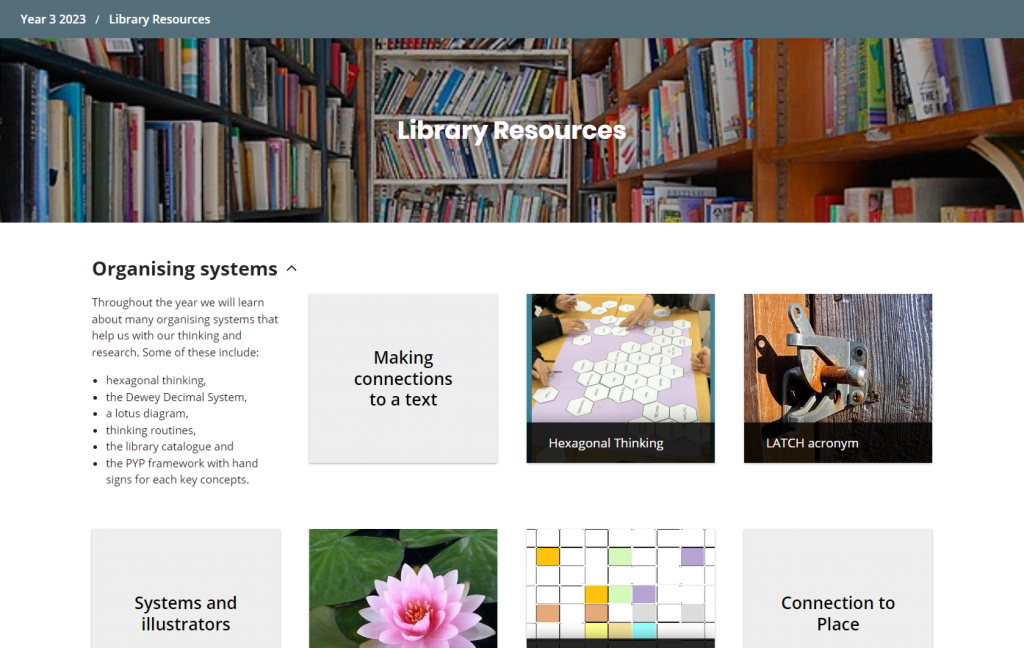
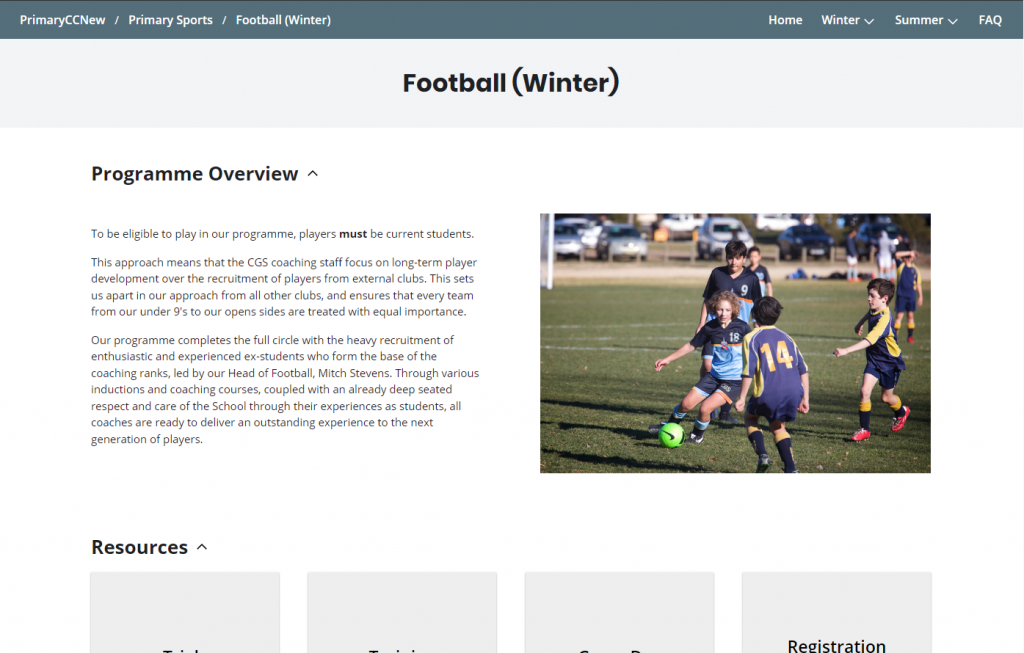
Real world examples:

Website Architecture

Websites have 1 or more Sites
Sites have a Menu
Pages have a Header and Sections
Sections have Blocks

Create & Distribute

A single website module instance can have one or more sites, based on the distribution method: The range of options are:

  • Single Site – This will create a single teacher-driven website, great for displaying course related information to students and parents.
  • Site per student – This will create a site instance for each student in the course, all contained within the same website module instance. Each student can then build and modify their own site. These can are visible and gradable to the teacher.
  • Page per student – This will create a single site with a page for each student in the course. Each page will be editable by the single student only but visible to all.

Create from Template

Use an existing website as a template for a new website. A complete copy will be generated from the template, with updated ownership and permissions.

Site Building

Sections

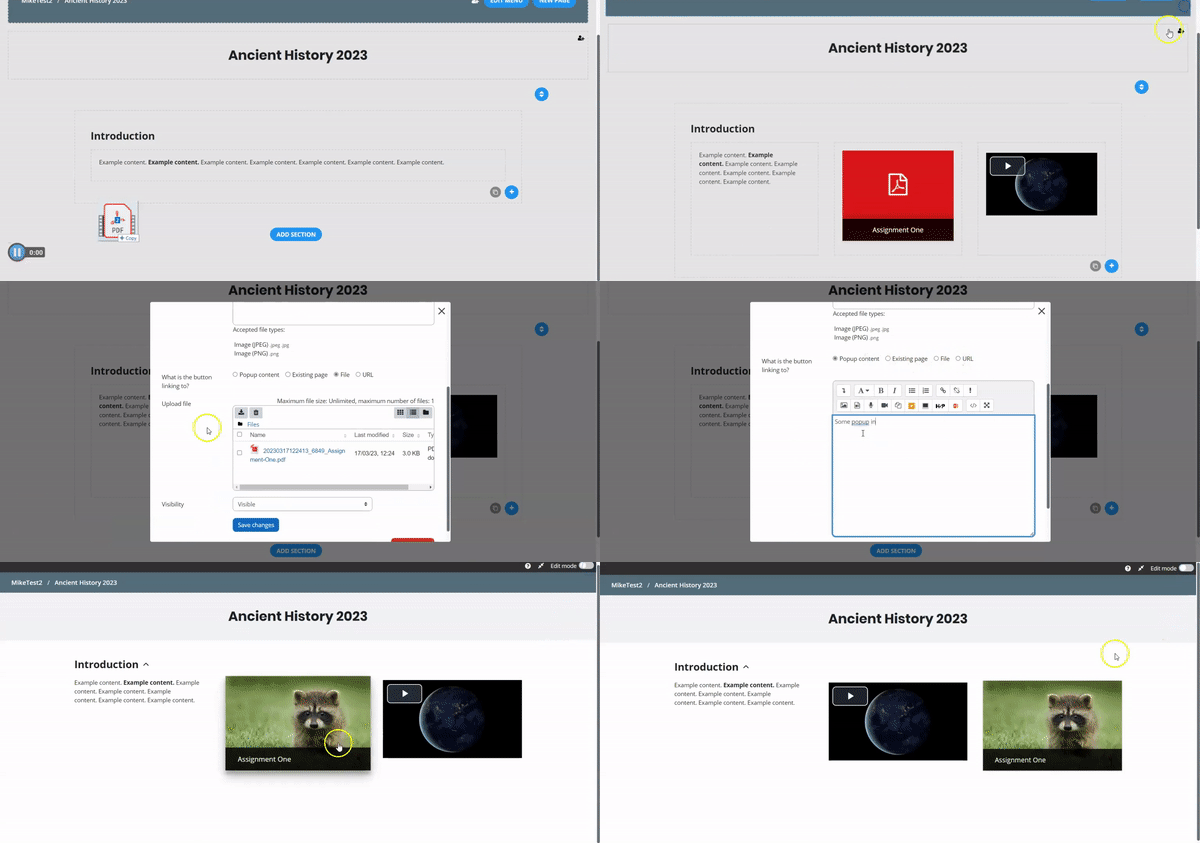
Adding blocks of content

Advanced block building

  • Drag and drop content onto your site
  • Create buttons linking to files, pages and modal/popup content
  • Reorder content by dragging

Pages and Menu

Add new pages and use the menu editor to organise navigational structure of your site.

  • Drag pages into menu
  • Set homepage and page visibility

Editing permissions

Set permissions at the Site and Page level

Student sites

When selecting this distribution method, teachers will be presented with a list containing a button to launch the site for each student, as well as to grade.

Student list:

Grading:

Going Serverless


Check out the finished product here: tradesact.com.au


What is Serverless?

Web applications typically have a backend (application logic and database) and frontend (user interface). In past times, the backend and frontend were both part of the one application. The backend would execute application logic (C#, PHP, Java), access the database (SQL), and then generate and serve the frontend (HTML/CSS/JS) to the browser. In recent years there has been a shift away from this towards a decoupling of frontend and backend logic. This allows independent technologies and infrastructure to be used for each. Modern frontends are typically built using a JS framework, such as Vue or React, and backends have become API endpoints, controllers and data stores, built using a framework like .NET, Laravel or Django. These applications are hosted on traditional server stacks such as Linux, Apache, MySQL & PHP.

Even more recently, there is the notion of “Serverless” web apps. Serverless does away with traditional hosting and traditional backend frameworks (Laravel, Express, etc), replacing both of these with managed services by cloud providers such as AWS, Azure, Google, Heroku, Netlify, Cloudflare and Supabase. Using a cloud provider, you can stitch together a set of services that essentially mimic a backend. These cloud services allow you to run application logic via HTTP endpoints (Functions as a Service) and access data stores. The functions spawn, execute and scale on demand. You don’t have to worry about the framework or servers on which they run. Databases and stores are also managed by the provider. You can use a single provider like AWS which has 100’s of services covering every facet of cloud computing, or stitch together services from multiple providers that do certain things well or cheaply. For example, Wasabi for object storage and Auth0 for user management. Many traditional hosting providers like Dreamhost, Linode, and DigitalOcean are now releasing services like object storage, FaaS, and managed databases. You are free to pick and choose providers and services to form your architecture. I went with a mostly AWS architecture for simplicity. It has the most mature offering with plenty of official and community docs.

My Serverless project

I built tradesact.com.au as a Serverless learning exercise. I started with Azure and moved to AWS using the SST framework for reasons mentioned above. The SST framework provides higher level constructs for the AWS CDK, which makes it really easy to develop and test your application. At deploy time, I used Seed, the CI platform built by the people behind SST. I discovered that AWS’s relational database offerings are quite expensive, so I switched to DigitalOcean’s managed Postgres service for the production database. I am using Heroku’s free tier for development and staging databases.

One of the caveats of the Serverless model is that you pay for what you use, and there is seemingly no limit as to how much your services can scale. Theoretically, you could be hit with a DDoS attempt resulting in your services to spike at a huge expense to you. Therefore, I’ve proxied access to the services through Cloudflare to provide some mitigation against these types of attacks.

The architecture

I use the following set of services to run tradesact.com.au.

Setting up the stacks

The infrastructure above is provisioned almost completely from code containing SST and AWS CDK constructs. The code is converted to CloudFormation templates internally which are used to provision all of the AWS services and resources. Some initial setup is needed, including creating an AWS account, IAM user, and installing the AWS CLI.

Buckets

I created an “Uploads” bucket in S3 to store file uploads such as logos. Within this there are public and private folders.

this.bucket = new sst.Bucket(this, "Uploads", {
  s3Bucket: {
    cors: [{
      allowedMethods: ["GET", "PUT", "POST", "DELETE", "HEAD"],
      allowedOrigins: ["*"],
      allowedHeaders: ["*"],
      maxAge: 3000,
    }],
  },
});

const s3BucketPolicy = new BucketPolicy(this, 'S3BucketPolicy', {
  bucket: this.bucket
})
s3BucketPolicy.document.addStatements(
  new iam.PolicyStatement({
    actions: ["s3:GetObject"],
    effect: iam.Effect.ALLOW,
    resources: [
      this.bucket.bucketArn + "/public/*",
    ],
    principals: [new iam.AnyPrincipal()],
  }),
)

The CORS configuration allows client access to the uploads bucket from the dev domains. A policy is added to the S3 bucket to allow public read access to the “public” folder. This allows direct access to objects like logos via their S3 URL, otherwise the app has to use a Signed URL which can be obtained from the Amplify Storage API. The staging and public sites will only be accessible via Cloudfront, so this policy is overwritten for those.

Authentication

To manage sign up and login functionality for users, I used an Amazon Cognito User Pool. It stores the user’s login info. It also manages user sessions in the Vue app.

const userPool = new cognito.UserPool(this, "UserPool", {
  selfSignUpEnabled: true,
  signInAliases: { email: true },
  signInCaseSensitive: false,
  lambdaTriggers: {
    postConfirmation: postConfirmationFunction,
    preSignUp: preSignUpFunction,
  },
  standardAttributes: {
    email: {
      required: true,
      mutable: true
    },
    givenName: {
      required: true,
      mutable: true,
    },
    familyName: {
      required: true,
      mutable: true,
    },
  }
});

The code above creates the user pool. It allows users to sign up, with email, first and last name. It allows for login using email (as opposed to username which is only used internally). I’ve added two triggers to the signup process. preSignUp automatically confirms the user and verifies the email. This simplifies the signup flow by putting the user into an active state without requiring email address verification. postConfirmation makes a copy of the pertinent user information in the database so that we do not need to interact with Cognito in the application beyond the user management services it offers us. Finally, a user pool client is created with SRP enabled to allow the web app to authenticate users via Amplify. The auth stack is complete with a user pool, client, and an identity pool.

Policies were then added to specify the resources authenticated users have access to. In this case, authenticated users need access to the API and S3 bucket.

this.auth.attachPermissionsForAuthUsers([
  this.api,
  new iam.PolicyStatement({
    actions: ["s3:*"],
    effect: iam.Effect.ALLOW,
    resources: [
      this.bucket.bucketArn + "/public/*",
      this.bucket.bucketArn + "/protected/${cognito-identity.amazonaws.com:sub}/*",
      this.bucket.bucketArn + "/private/${cognito-identity.amazonaws.com:sub}/*",
    ],
  }),
  new iam.PolicyStatement({
    actions: ["s3:GetObject"],
    effect: iam.Effect.ALLOW,
    resources: [
      this.bucket.bucketArn + "/protected/*",
    ],
  }),
]);

I created an IAM policy to secure the files users will upload to the S3 bucket. We add the user’s federated identity id to the path so a user has access to only their folder within the bucket. This allows us to separate access to the user’s file uploads within the same S3 bucket.

API

The API, via API Gateway, is what joins the front end to the backend logic. It exposes HTTP endpoints for use by the Vue.js client.

const authorizer = new HttpUserPoolAuthorizer('APIAuthorizer', this.auth.cognitoUserPool, { userPoolClients: [this.auth.cognitoUserPoolClient] });

this.api = new sst.Api(this, "Api", {
  customDomain: process.env.API_DOMAIN ? process.env.API_DOMAIN : undefined,
  defaultThrottlingRateLimit: 500,
  defaultThrottlingBurstLimit: 100,
  defaultAuthorizationType: sst.ApiAuthorizationType.JWT,
  defaultAuthorizer: authorizer,
  defaultFunctionProps: {
    environment: {
      DB_CONNECTION_STRING: process.env.DB_CONNECTION_STRING,
    },
  }
});

this.api.addRoutes(this, {
  // Authenticated routes
  "POST   /businesses": "src/businesses/create.main",
  "DELETE /businesses/{id}": "src/businesses/delete.main",
  "POST   /businesses/{id}/reviews": "src/businesses/create_review.main",
  "DELETE /businesses/{id}/reviews/{rid}": "src/businesses/delete_review.main",

  // Public routes
  "GET    /categories/{categorySlug}/businesses": {
    function: "src/businesses/list.main",
    authorizationType: sst.ApiAuthorizationType.NONE,
  },
}

The configuration includes a custom domain for the API, set from an environment variable, JWT authorization for requests, some sensible throttling limits, and a database connection string which is passed to the handler functions. Above is an example of an authenticated route (requiring a user to be logged in) such as adding a new business, and a public route (open to anyone that visits the site) such as fetching businesses by category. The Vue client makes requests to API Gateway secured using JWT authentication. API Gateway checks with the Identity Pool to determine if the user has authenticated with the User Pool. API Gateway invokes the appropriate Lambda function and passes in the Identity Pool user. The handler functions are Node.js based Lambda functions which execute some backend logic, like saving or retrieving a record from the database, and returning a json response to the client.

Cron

I utilised cron jobs to generate counters, badges, scores and cleanup tasks. Counters are used to track things like number of interactions with a business. Badges are used to label businesses as “New” and “Trending”. Scores are normalised, numerical, and sortable values that are used for sorting and badge allocation. Cleanup tasks are used to keep the database light.

const cronScoresTrending = new sst.Cron(this, "cronScoresTrending", {
  schedule: "cron(15 1 * * ? *)", // 01:15 AM (UTC) every day.
  job: {
    handler: "src/cron/scores_trending.main",
    environment: {
      DB_CONNECTION_STRING: process.env.DB_CONNECTION_STRING,
    },
  }
});
const cronCountsReviews = new sst.Cron(this, "cronCountsReviews", {
  schedule: "cron(15 1 * * ? *)", // 01:15 AM (UTC) every day.
  job: {
    handler: "src/cron/counts_reviews.main",
    environment: {
      DB_CONNECTION_STRING: process.env.DB_CONNECTION_STRING,
    },
  }
});
const cronBadgesNew = new sst.Cron(this, "CronBadgesNew", {
  schedule: "cron(15 1 * * ? *)", // 01:15 AM (UTC) every day.
  job: {
    handler: "src/cron/badges_new.main",
    environment: {
      DB_CONNECTION_STRING: process.env.DB_CONNECTION_STRING,
    },
  }
});

The tasks are scheduled using a typical cron construct. Internally this uses AWS EventBridge. The handler lambda function is called and the database connection string is passed to it via an environment variable.

Database

DynamoDB, despite being pushed by AWS, has a very specific and limited use case. You’re going to have a tough time if your data is relational and transactional in nature and you need flexible, performant queries. I initially used RDS, however, after a months usage without a single hit, I discovered a charge in excess of $150USD. Part of that cost was from a managed NAT Gateway which is automatically provisioned when utilising RDS within a VPC. This is by far the most expensive service and way beyond what I am prepared to pay for a hobby site. Therefore, I moved to Heroku for dev, and DigitalOcean for prod. They both have very simple managed offerings. The connection strings are stored in environment variables.

That’s mostly it for the backend. With that, a scalable and worry-free infrastructure is in place, including a relational database, object storage, user management and authentication, API endpoints, and a way to run backend application logic. I could tie in additional services, and there are hundreds of them, but that’s all I needed for now.

The Frontend

The frontend is where the bulk of the work is. The serverless model lets you focus on what makes your app unique, the functionality and presentation of your offering. I built the frontend using Vue.js. Since the focus of this blog is how I utilised Serverless I won’t cover any of the internals of the Vue app itself.

const site = new sst.StaticSite(this, "TradesACTSite", {
  path: "frontend",
  customDomain: process.env.SITE_DOMAIN ? process.env.SITE_DOMAIN : undefined,
  buildOutput: "dist",
  buildCommand: "npm run build",
  errorPage: sst.StaticSiteErrorOptions.REDIRECT_TO_INDEX_PAGE,
  environment: {
    VUE_APP_API_URL: api.customDomainUrl || api.url,
    VUE_APP_REGION: scope.region,
    VUE_APP_BUCKET: bucket.bucketName,
    VUE_APP_USER_POOL_ID: auth.cognitoUserPool.userPoolId,
    VUE_APP_IDENTITY_POOL_ID: auth.cognitoCfnIdentityPool.ref,
    VUE_APP_USER_POOL_CLIENT_ID: auth.cognitoUserPoolClient.userPoolClientId,
    VUE_APP_RECAPTCHA_SITEKEY: process.env.VUE_APP_RECAPTCHA_SITEKEY,
  },
  cfDistribution: {
    additionalBehaviors: {
      'public/*': {
        origin: new origins.S3Origin(bucket.s3Bucket, {
          originAccessIdentity: bucket.OriginAccessIdentity,
        }),
        allowedMethods: cloudfront.AllowedMethods.ALLOW_ALL,
        compress: true,
        viewerProtocolPolicy: cloudfront.ViewerProtocolPolicy.REDIRECT_TO_HTTPS,
      },
    },
  }
});

The StaticSite construct deploys the Vue app to an S3 bucket, creates a CloudFormation distribution, and configures the custom domain for it. Environment variables are passed to the Vue app from the backend, including the API URL, uploads Bucket, and User Pool.

The custom Cloudfront distribution configuration allows Cloudfront to serve requests for the S3 bucket so that objects can only be accessed via the custom domain. This automatically creates the appropriate bucket policies.

Adding some protection

My biggest concern with being caught up in DDoS type attack is not the availability of the site, it’s the bill that I imagine would result from a spike in usage like that. I am unaware of an option to automatically pause/disable services if a predefined budget is reached.

To mitigate this I have set low but reasonable burst and rate limits on the API. If these limits are reached, the API will be throttled.

I have also proxied the website and API through Cloudflare. This means that all traffic to the web app passes through Cloudflare before it hits my services. AWS WAF is then used to restrict access to the site to Cloudflare’s IP addresses, ensuring that all traffic passes through the proxy. Cloudfare’s free tier provides basic DDoS protection, bot mitigation, CDN, and has an “under attack mode” which can be switched on in the event of an attack to enable an array of additional security measures.

Providers and pricing

The big name providers have very complex pricing models and are expensive when compared to the smaller players. Providers like Cloudflare, Wasabi, DigitalOcean, and Linode are significantly more affordable and predictable in pricing. Wasabi for example, advertises an 80% saving over S3. A stack that combines these cheaper providers, for example Cloudflare Workers for CDN, API and backend logic, Wasabi for storage, and DigitalOcean for database, would bring significant savings over a pure AWS setup. I plan to explore this further.

Tradesact.com.au features

A little about the features of tradesact.com.au.

Continuous Feedback


A new direction

  • A shift away from semester based reporting to a continuous feedback model providing timely, targeted, and calculated feedback to students about their learning progress.

The solution

  • A central interface to manage the creation of assessments, handle grading, feedback, and ultimately, parent messaging and views of learning progress. 
  • Value added for students and parents, being able to see view progress over time. 
  • End of semester reports are drastically simplified, reducing end of semester reporting burden.

Task creation

  • Define a summative task
  • Define the rubric for the task
  • Select Evidence of leaning attachments and links

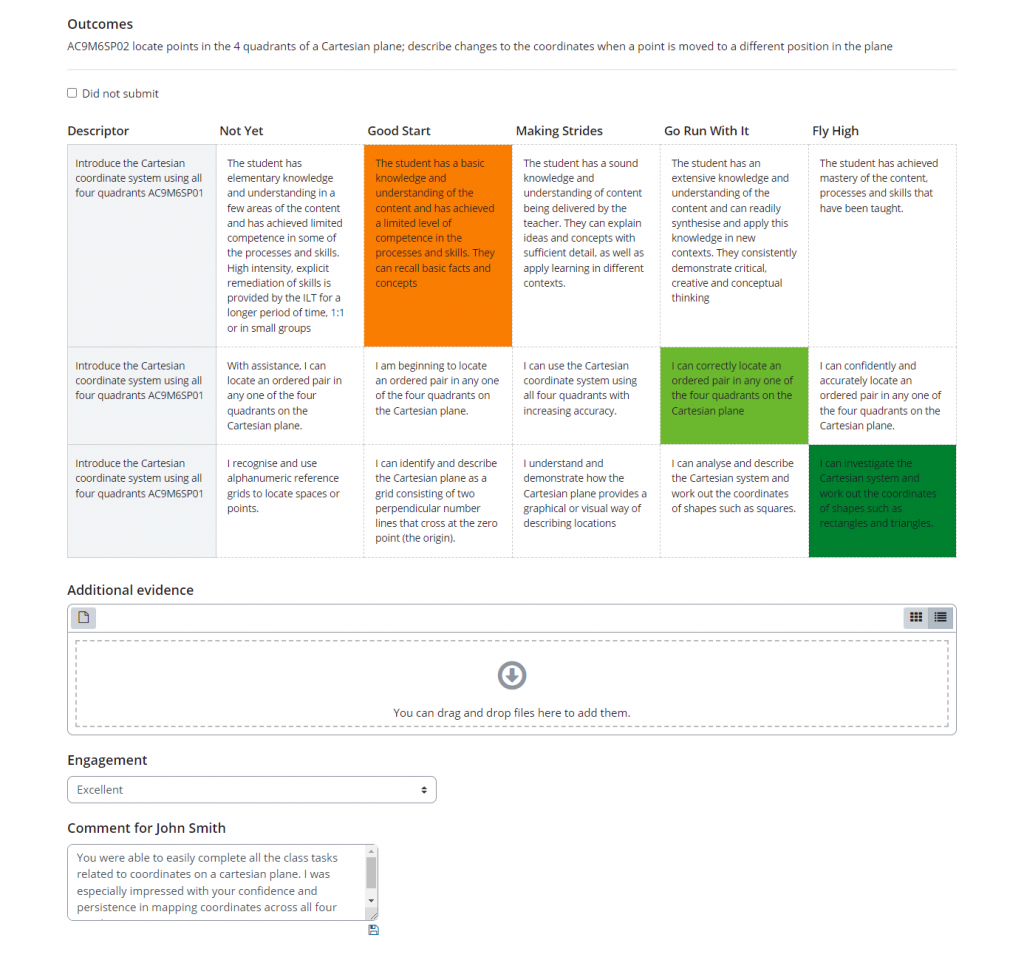
Task Feedback

  • Grade the rubric
  • Add evidence of learning
  • Add a comment

Affective grading

  • A single place where teachers can input affective grades for students they teach.
  • Insights can be gained from related task engagement
  • Synced to SIS (Synergetic) via scheduled task to be included in semester reporting.

Excursion Planning System

Check out the git repo: https://github.com/cgs-ets/moodle-local_excursions


The problem

  • All excursions/incursions in the school need to undergo an approval process, looking at risks, event timing, parent permissions etc. This involved manual and error-prone paper-based handling for a complex process with serious duty of care implications.
  • Forms developer attempted digitisation via a number of SmartIQ forms, but the solution was found to be inadequate, convoluted and difficult to audit. 

The solution

  • A simple and unified interface for the planning process, including entry, collaboration, and approvals.

Planning

  • Form fields for event information and documents
  • Flexible and open approach to limit back and forth movement in the process – Information can always be changed
    • At any stage of the planning
    • By any organiser or approver
    • After the event has occurred
    • Organisers and approvers will be notified of changes
    • Certain fields are configured to trigger a new approval flow

Student list

  • Who will be attending? Select by
    • individual
    • course
    • group 
    • taglist (SIS integration)
  • Live medical report
    • Generated on SIS, based on selected student list.
  • Student alerts
    • Excursion consent (warning), data not updated (info). Does not prevent inclusion.

Planning Review

  • Displayed as a side pane on the unified interface.
  • Separate workflows for PS and SS
  • Sequential / parallel steps
    • E.g. Approval step 1 and 2 can happen in parallel, but approval step 3 inactive until both 1 and 2 complete.
  • Skippable steps
    • Approver from previous step can skip next step.
  • Backup approvers
    • Additional users can be added as approvers for a step. User can be notified at multiple emails.
  • Invalidated steps
    • Define fields that invalidate approval. E.g. new event time will cancel admin approval and notify approver.
  • Chat with organising staff and other approvers throughout the planning process.

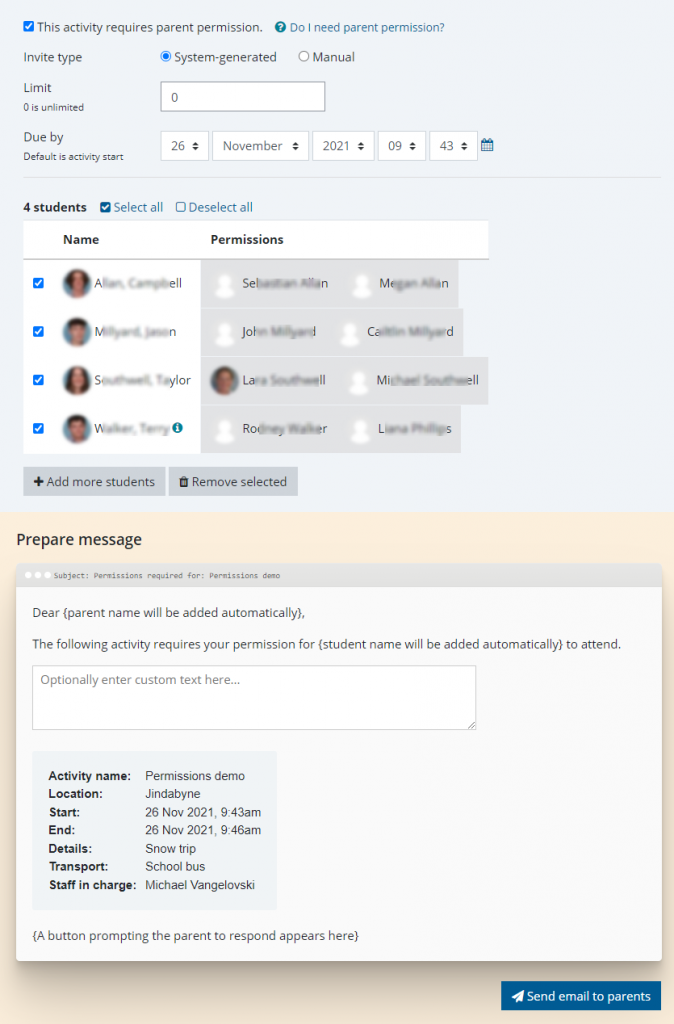
Parent Permissions

  • After an activity is approved, staff in charge may send permission notes through the system.
  • Parents will not be able to consent once limit or due by is reached.
  • Pre-filled email template with optional custom text.
  • Email link opens to a page with event details and an option to respond with consent.
  • Parents of students with outdated data will be prompted to complete the Student Data Check form after providing a response.
  • Responses are visible to the organising staff member.

Notifications

  • Emails sent by the system to keep everyone up to date.

Absence events

  • Integrated with SIS. 
  • Expected absences automatically created 2 weeks from activity start.
  • Absence records synced with changes to student list until 7 days after event

Roll marking

  • Rolls created in SIS for roll marking on and during the event.

Moodle Announcements System

Check out the git repo: https://github.com/cgs-ets/moodle-local_announcements


The problem

  • Parent feedback was that they were overwhelmed with messaging from the School.
  • Communications were from multiple disparate channels, including direct ad hoc email.
  • Format and delivery was inconsistent.

The solution

  • A system to provide a unified channel of communications.
  • Fine-grained audience targeting (courses, groups, years, campuses, houses, year levels, sports, etc)
  • Communications to be delivered in a single and consistent daily digest, rather than individually and at all times.
  • Usage
    • ~ 15,000 posts sent, translating to 
    • ~ 13,000,000 individual messages which would have been received via disparate channels

Demo – posting an announcement:

Targeting

  • A single interface for selecting any audience combination.
  • Cohorts – Courses, groups, years, whole campuses, houses, year levels, sports, etc.
  • Roles – staff, parents, students
  • Complex combinations
    • Unions – Example, All of Year 7 and 8 students
    • Intersections – Example, Football students in Year 10

Delivery

  • Available on the web interface immediately.
  • Deliver to email is consolidated to a once-per-day digest.
  • Ability to set availability of the post and also scheduled delivery for a later date.
  • Ability to override and send post immediately for critical messaging.

Moderation

  • A benefit of a unified and custom messaging channel is the ability to control the messaging the comes from the school.
  • Moderate from web interface or button in email.
  • Configurable rules which determine whether moderation is required and by whom. 
  • Rules based on creator’s capabilities, target audience, audience size and selected
    roles.

Impersonation

  • Configure impersonation rules, allowing some users to send announcements on behalf of others

Technical Information

Developed as a “local” moodle plugin. A companion block also exists for displaying latest announcements within courses (See moodle-block_latest_local_announcements).

Key functionality:

  • Announcement creation with attachments
  • Complex and extensible audience types
  • The ability to combine and intersect audiences
  • Advanced configuration of privileges
  • Daily digest emails with branding, processed via scheduled jobs
  • Notifications (web, email, mobile) with individual preferences, processed by scheduled jobs
  • Force send announcements for emergencies
  • Announcements integrated with Moodle search
  • Moderation workflow – approve, reject, defer
  • Moderation from email (tokenised approve button)
  • Moderator assistants
  • Announcement administration, auditing and impersonation
  • Additional recipients

Configuration

Global Settings
  • perpage → Number of announcements per page
  • maxbytes → Maximum upload bytes
  • globaldisable → Enable/Disable Digest
  • maxeditorfiles → Default number of editor files allowed per announcement
  • maxattachments → Default number of attachments allowed per announcement
  • shortpost → Number of characters to truncate message for short message
  • enablenotify → Enable/Disable Notifications.
  • enabledigest → Enable/Disable Digest.
  • digestheaderimage → URL for digest header image
  • digestfooterimage → URL for digest footer image
  • digestfooterimageurl → URL for digest footer image link
  • forcesendheaderimage → Header image URL for immediate (forcesend) announcements
  • showposterallinctx → True/False whether a poster can view all within contexts they can post, even when not specifically targeted.
Audience Providers

Audience providers handle the logic for targeting audiences. Audience providers extend the audience_provider base class and implement a set of required functions that are required by the broader system to interact with audience.

The current audience providers are:

  • audience_mdlcourse.php – handles targeting of announcements to Moodle courses.
  • audience_mdlgroup.php – handles targeting of announcements to groups in Moodle.
  • audience_mdlprofile.php – handles targeting of announcements based on custom user profile fields.
  • audience_mdluser.php – handles targeting of announcements directly to Moodle users.
  • audience_combination.php – handles targeting of announcements to arbitrary combinations of audiences from other audience providers.
Audience Types

The ann_audience_types table is used to define the ways user’s can be targeted by announcements via the front end. Each row in the table directly corresponds to a tab in the audience selection interface.

  • type → the key used for the audience type
  • namesingluar → the name of the audience type
  • nameplural → the plural of the audience type name
  • provider → which audience provider handles the logic for this audience type
  • active → whether the audience type is enabled
  • filterable → whether to show a search field that is used to filter audience items. If true, the audience items are hidden by default and revealed by typing.
  • grouped → whether to group the audience items. The value of audience items must be in the following format , e.g. Senior School:Staff. The groupdelimiter column is used to define the delimiter, e.g. :.
  • uisort → tabs are sorted and displayed horizontally according to this value.
  • roletypes → a comma separated list of the role types that can be targeted for this audience type. Audience providers handle different roles in different ways, but most cater Students, Mentors, and Staff. The roles that an audience provider caters to is specified in the constant ::ROLES. Aliases can be defined with square brackets, e.g. Mentors[Parents]. Students generally means that you will target users enrolled as students in the selected audiences. Mentors generally means you will target users that are mentors of users that are enrolled as students in the selected audiences. Staff generally means you will target users enrolled as teachers (editing and non-editing), managers, and course creators.
  • scope → Used to narrow the audience items to a specific scope. This limits what audience items are displayed in the audience selector for a given audience type. Each audience provider uses this field in it’s own way. Used to limit audience items to certain course categories for a mdlcourse based audience type. Used to specify the profile field for a mdlprofile based audience type.
  • description → a field to describe the audience type.
  • groupdelimiter → the delimiter used when splitting a value for grouped audiencetypes. See “grouped” above.
  • itemsoverride → Used by some providers to override the values presented in the UI to be a fixed set rather than a system generated set. Required for the combination provider as the combination provider displays a fixed set of audience items. Can be used by the mdlprofile provider to specify the possible options for the given profile field, otherwise the system will attempt to generate the possible options by looking at distinct values for all users of the system.
  • visiblechecktype → not currently used. To be used to determine whether a tab is displayed to an end user or not. Currently all tabs are displayed whether the tab has any audience items or not for the user (audience items are not loaded until the tab is clicked).
  • visiblecheckvalue → not currently used.
  • excludecodes → comma separated list of codes (of audience items, e.g. course idnumber) to exclude from the set.
Privileges

Privileges determine whether a user can post to an audience, and whether their post requires moderation or not. The ann_privileges table contains the configuration for privileges. Each row defines a specific check for a given audience type etc.

Determining whether a user can post to the selected audience:

When an announcement is posted, the system retrieves the privilege checks that must be performed based on the audiences that were targeted. It then executes the checks one at a time, ordered by checkorder, until a check evaluates to true. For example, if an announcement is targeting a course, the system will check whether the user as the “local/announcements:post” capability within that course. If the check returns true, the system will save the announcement and set up moderation based on the moderation columns. If the check returns false, the system will move to the next check. If all checks are false, the announcement is not stored. Note, this should never happen as audiences are not displayed to the user on the front end unless they have privileges to post to that audience (the checks are performed as the audiences are retrieved for the UI).

Determining whether moderation is required:

The same privilege checks are used to determine moderation. The checks are executed in order of “checkorder” until a row that matches the audience, roles selected, condition of the announcement is found. Only the first matching check is used to determine whether moderation is required for the given audience.

If an announcement has multiple audiences, and each matches to a privilege check where “modrequired” is true, “modprioirty” is used to determine who should moderate the post.

If the post is an intersection, moderation is not required if moderation is not required for at least one of the audiences within the intersection.

If union the post contains a union, moderation is required if moderation is required for any of the specified audiences.

Privileges configuration table fields:
  • audiencetype → the audience type this privilege applies to. E.g. course
  • code → the audience code this privilege applies to. E.g. Science-0703-2020
  • role → the audience roles this privilege applies to. E.g. Students. Default is “*” meaning apply to all.
  • condition → whether this privilege applies to standard or intersected audiences. Default is “*” meaning apply to all.
  • forcesend → whether this privilege applies to immediate or digest announcements. Default is “*” meaning apply to all.
  • description → human readable description of the privilege.
  • checktype → the type of check to perform to determine whether user has this privilege. Options: usercapability|coursecapability|username|profilefield|exclude
  • checkvalue → the value of the check, e.g. a capability, username, profilefield, etc.
  • checkorder → the order in which to execute the check if there are multiple competing checks.
  • modrequired → whether moderation is required for this privilege.
  • modthreshold → the number of items matching this privilige before moderation is required.
  • modusername → the moderator
  • modpriority → the priority of this moderation. Used to determine moderator if announcement has audiences with competing moderation requirements.
  • active → whether the privilege check is active.
Moderator Assistants

Assistants to moderators can action items on behalf of the moderator. They also bypass moderation when sending an announcement that would ordinarily be moderated by the user they assist.

Impersonators

The ann_impersonators table is used to control impersonation capabilities. It contains an index of users that can post announcements on behalf of other users. A wildcard “” character in the impersonateuser field enables the author to search and impersonate any “staff” member. Announcement admins automatically have this ability. This relies on a CampusRole custom profile field. Moderation is bypassed if either the author OR the user that is being impersonated does not require moderation. If both users require moderation based on the selected audiences, the author’s moderation requirements is used. Users can edit and delete the announcements that they have been impersonated in, however they cannot change the impersonated user to another user.

CC Groups

Some users need to be CC’d into audiences they are not directly enrolled or involved in. “CC groups” allows you to include a group of users to the list of ordinary recipients based on the audiences and conditions selected.

CC groups configuration table fields:
  • audiencetype → the audience type this cc group applies to.
  • code → the audience code this cc group applies to. Default is “*” meaning apply to all.
  • role → the audience roles this cc group applies to. E.g. Students. Default is “*” meaning apply to all.
  • forcesend → whether this privilege applies to immediate or digest announcements. Default is “*” meaning apply to all.
  • description → human readable description of the privilege.
  • ccgroupid → the id of the group to include in the announcement recipients. Comma-separated for multiple.
Capabilities
  • local/announcements:post → Given to editing teachers, managers, and coursecreators by default in their courses.
  • local/announcements:administer → Checked in various functions across the system to allow admin users to do basically anything.
  • local/announcements:auditor → Allows users to view all announcements in the system
  • local/announcements:emergencyannouncer → Allows users to send immediate (forcesend) announcements without moderation.
  • local/announcements:unmoderatedannouncer → Allows users to post announcements without moderation.
Database
Database Diagram

Knowledge Base


The problem

  • Information including policies and guides scattered throughout disparate sources, such as document stores and websites, and not easily discoverable, accessible nor maintainable.

The solution

  • An accessible knowledge base, with access based on community role (staff, parent, student, public)
  • Performant search capability
  • Handbooks feature – allowing information to be organised and grouped logically and sequentially for members of the community, such as “New staff handbook”, “Senior School Parent Handbook”, etc.
  • Usage
    • Currently over 1000 guides
    • 36 Handbooks
    • ~1000 requests for information daily
  • Resulting in
    • Fewer calls and requests to administration and support services
  • Reduced time in support by being able to reference the KB